Tips On How To Create And Store Anchor Charts
Is there anything a teacher loves more than a newly created anchor chart? I think not! Creating a new anchor chart to use with your students brings happiness to a teacher’s heart, but what happens when you are done with the chart? You display the chart in your classroom for the rest of the year or until your students have mastered the topic or moved on. Then it’s usually replaced with a new anchor chart. At the end of the year, you probably have a massive pile of anchor charts to discard.
I know it hurts your teacher heart to throw away anchor charts that you spend precious time creating. It hurt mine too. So I came up with an idea.
Creating Your Anchor Charts
As you probably already know, it is best practice to create the anchor chart WITH your students as part of the learning process, and I’m all for that, but that doesn’t mean you have to create the entire chart with your students. I wanted to develop a way to reuse my beautifully created anchor chart year after year.
Before the lesson where I will be using the anchor chart, I create the shell. This means I make the background, designs, titles or subtitles, or any part of the chart that doesn’t have to be created with the students. Now here’s the magic part. I laminate it. Yes, I laminate the entire anchor chart with the designs and information that students won’t be adding.
When it’s time for the lesson, I will fill in the blanks with students’ input and direction using an expo marker! This way, when we are done with the anchor chart, I can clean it and store it away for next year.
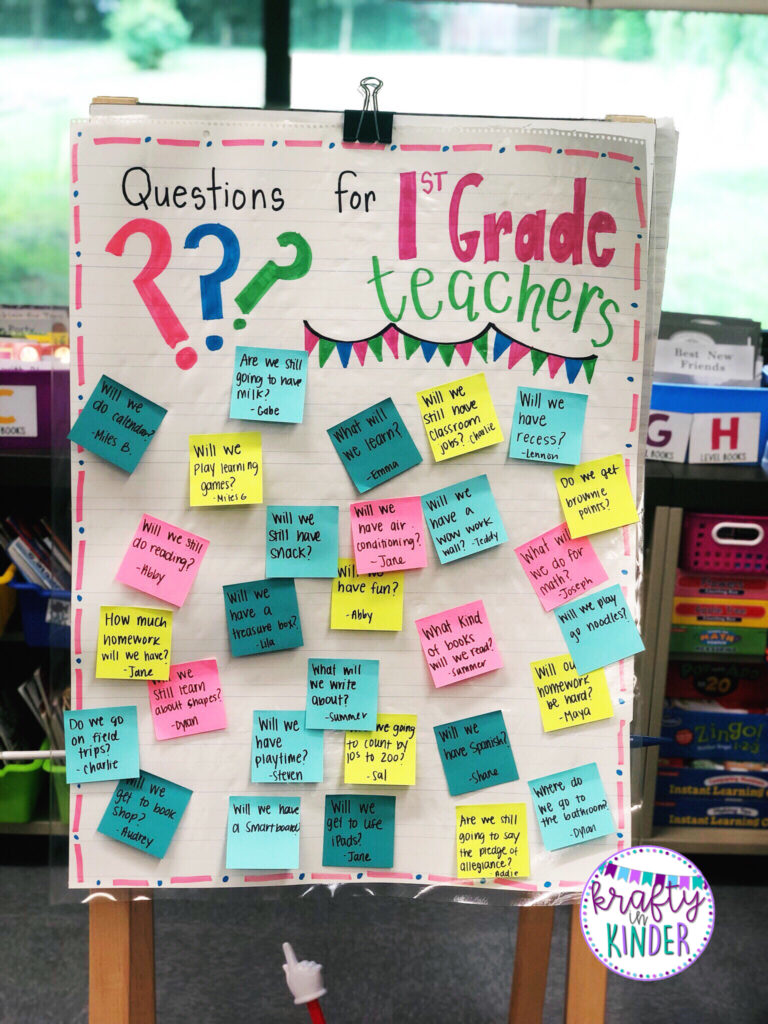
As you can see in the image, I decorated the border and wrote the title for this anchor chart. As a class, we filled in sticky notes to complete the chart. Next year, all I have to do is remove the sticky notes, and it’s good to go!
Storing Your Anchor Charts
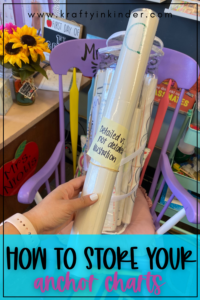
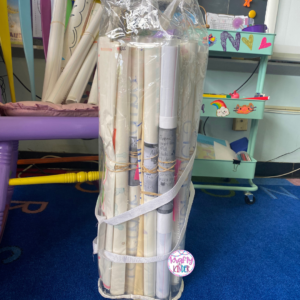
After cleaning off the expo marker, I roll the anchor chart and secure it with a rubber band. Before storing it, I write the topic on a sticky note and place it under the rubber band. This helps me locate charts next year without opening them up to see what is written on them. You can even take it a step further and take a picture of the completed chart. Not only does that make it incredibly easy to locate, but you’ll know how to fill it in with your students for years to come.
Then I store the rolled-up chart in a clear plastic wrapping paper storage bag! I got mine from Amazon. Now all my anchor charts are ready for next year, and all I have to do is take them out for the lesson and add to them with my students!
Save This Post
Save this post on your favorite classroom organization’s Pinterest board so you’ll have all the ideas at your fingertips!